TiDB is an open-source distributed Hybrid Transactional and Analytical Processing (HTAP) database built by PingCAP, powering companies to do real-time data analytics on live transactional data in the same data warehouse — minimize ETL, no more T+1, no more delays. More than 200 companies are now using TiDB in production. Its 2.0 version was launched in late April 2018 (read about it in this blog post).
In this 5-minute tutorial, we will show you how to spin up a standard TiDB cluster using Docker Compose on your local computer, so you can get a taste of its hybrid power, before using it for work or your own project in production. A standard TiDB cluster includes TiDB (MySQL compatible stateless SQL layer), TiKV (a distributed transactional key-value store where the data is stored), and TiSpark (an Apache Spark plug-in that powers complex analytical queries within the TiDB ecosystem).
Ready? Let’s get started!
Setting Up
Before we start deploying TiDB, we’ll need a few things first: wget, Git, Docker, and a MySQL client. If you don’t have them installed already, here are the instructions to get them.
macOS Setting Up
- To install
brew, go here. - To install
wget, use the command below in your Terminal:brew install wget --with-libressl - To install Git, use the command below in your Terminal:
brew install git - Install Docker: https://www.docker.com/community-edition.
- Install a MySQL client:
brew install mysql-client
Linux Setting Up
- To install
wget, Git, and MySQL, use the command below in your Terminal:- For CentOS/Fedora:
sudo yum install wget git mysql - For Ubuntu/Debian:
sudo apt install wget git mysql-client
- For CentOS/Fedora:
- To install Docker, go here.After Docker is installed, use the following command to start it and add the current user to the Docker user group:
sudo systemctl start docker # start docker daemosudo usermod -aG docker $(whoami) # add the current user to the Docker user group, so you can run docker without sudoYou need to log out and back in for this to take effect. Then use the following command to verify that Docker is running normally:
docker info
Spin up a TiDB cluster
Now that Docker is set up, let’s deploy TiDB!
- Clone TiDB Docker Compose onto your laptop:
git clone https://github.com/pingcap/tidb-docker-compose - Optionally, you can use
docker-compose pullto get the latest Docker images. - Change your directory to
tidb-docker-compose:cd tidb-docker-compose - Deploy TiDB on your laptop:
docker-compose up -d
You can see messages in your terminal launching the default components of a TiDB cluster: 1 TiDB instance, 3 TiKV instances, 3 Placement Driver (PD) instances, Prometheus, Grafana, 2 TiSpark instances (one primary, one secondary), and a TiDB-Vision instance.
Your terminal will show something like this:
Congratulations! You have just deployed a TiDB cluster on your laptop!
To check if your deployment is successful:
- Go to: http://localhost:3000 to launch Grafana with default user/password: admin/admin.
Note:
If you are deploying TiDB on a remote machine rather than a local PC, go to
http://<remote host's IP address>:3000instead to access the Grafana monitoring dashboard.- Go to
Homeand click on the pull down menu to see dashboards of different TiDB components: TiDB, TiKV, PD, entire cluster. - You will see a dashboard full of panels and stats on your current TiDB cluster. Feel free to play around in Grafana, e.g.
TiDB-Cluster-TiKV, orTiDB-Cluster-PD.
- Go to
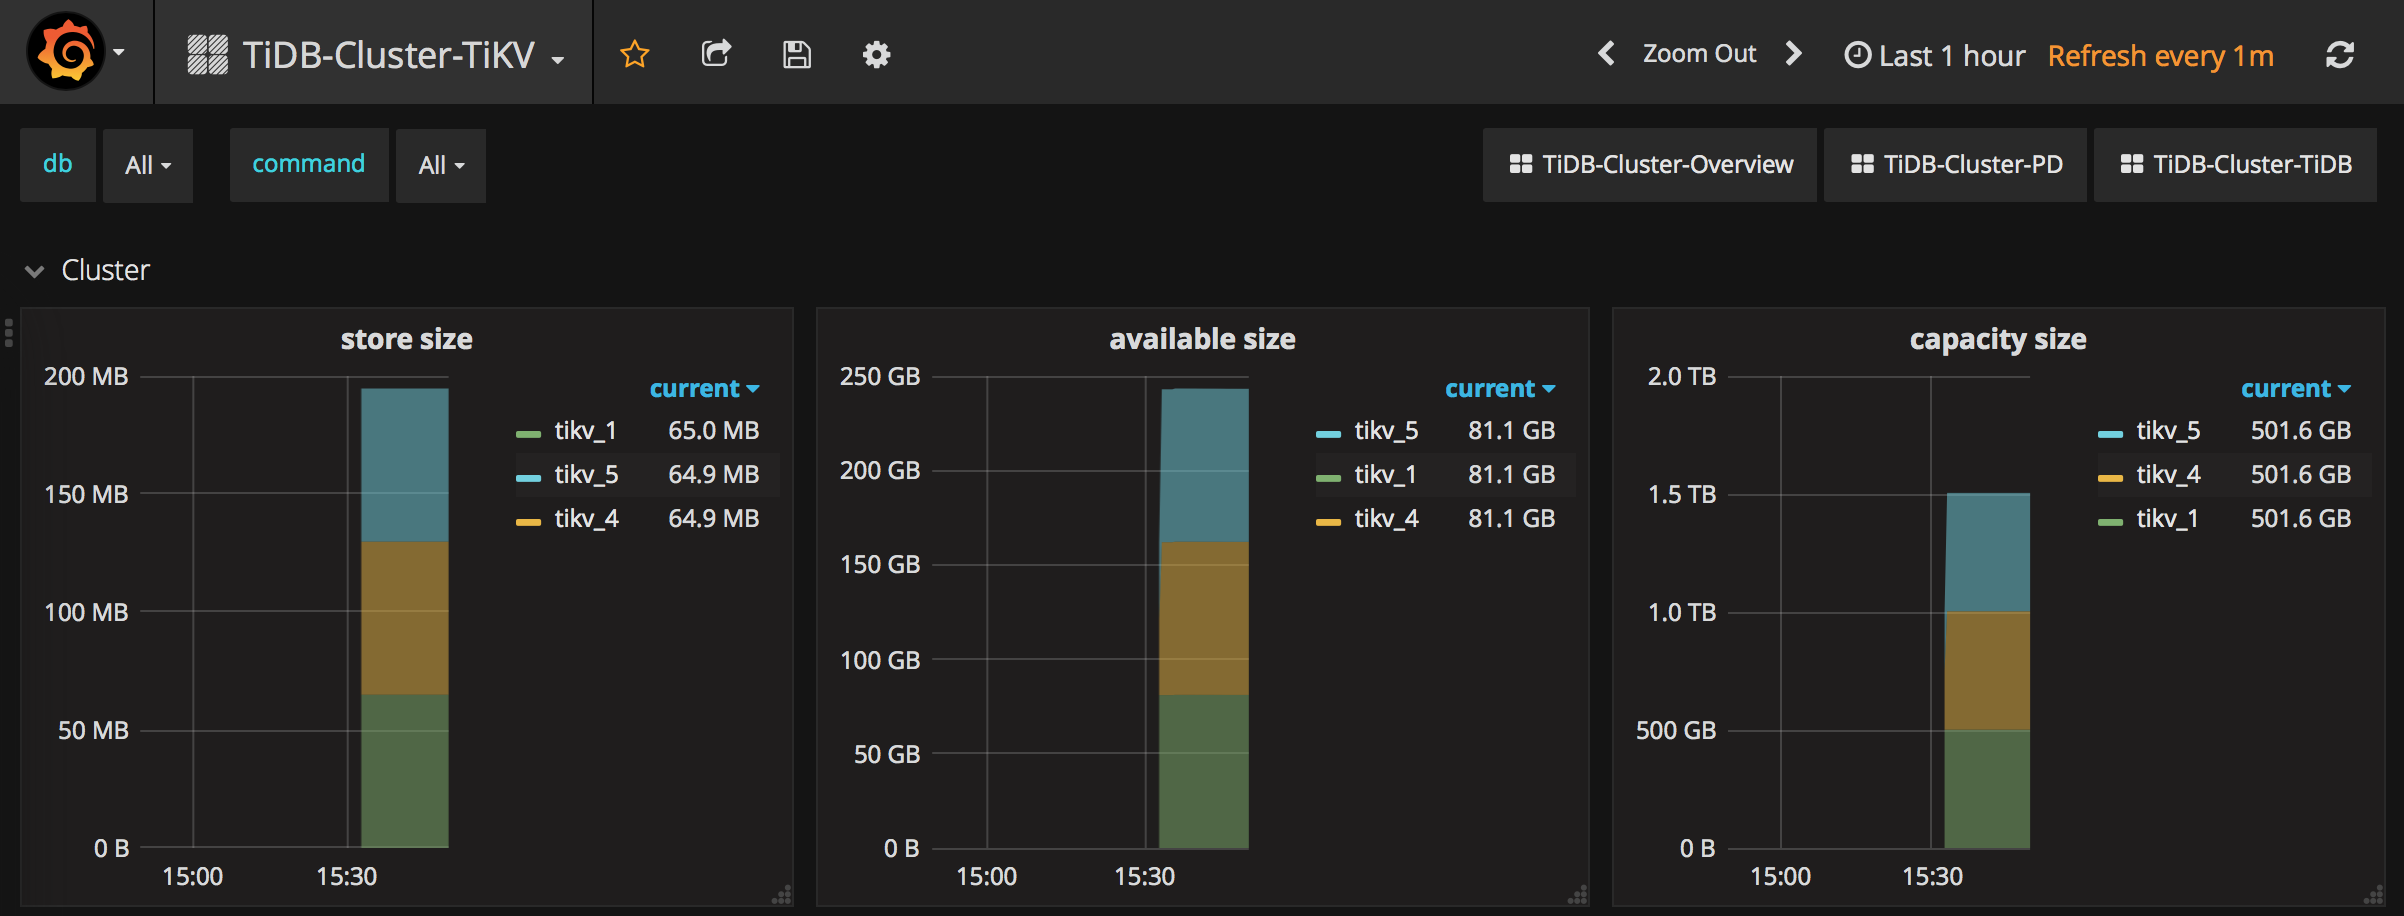
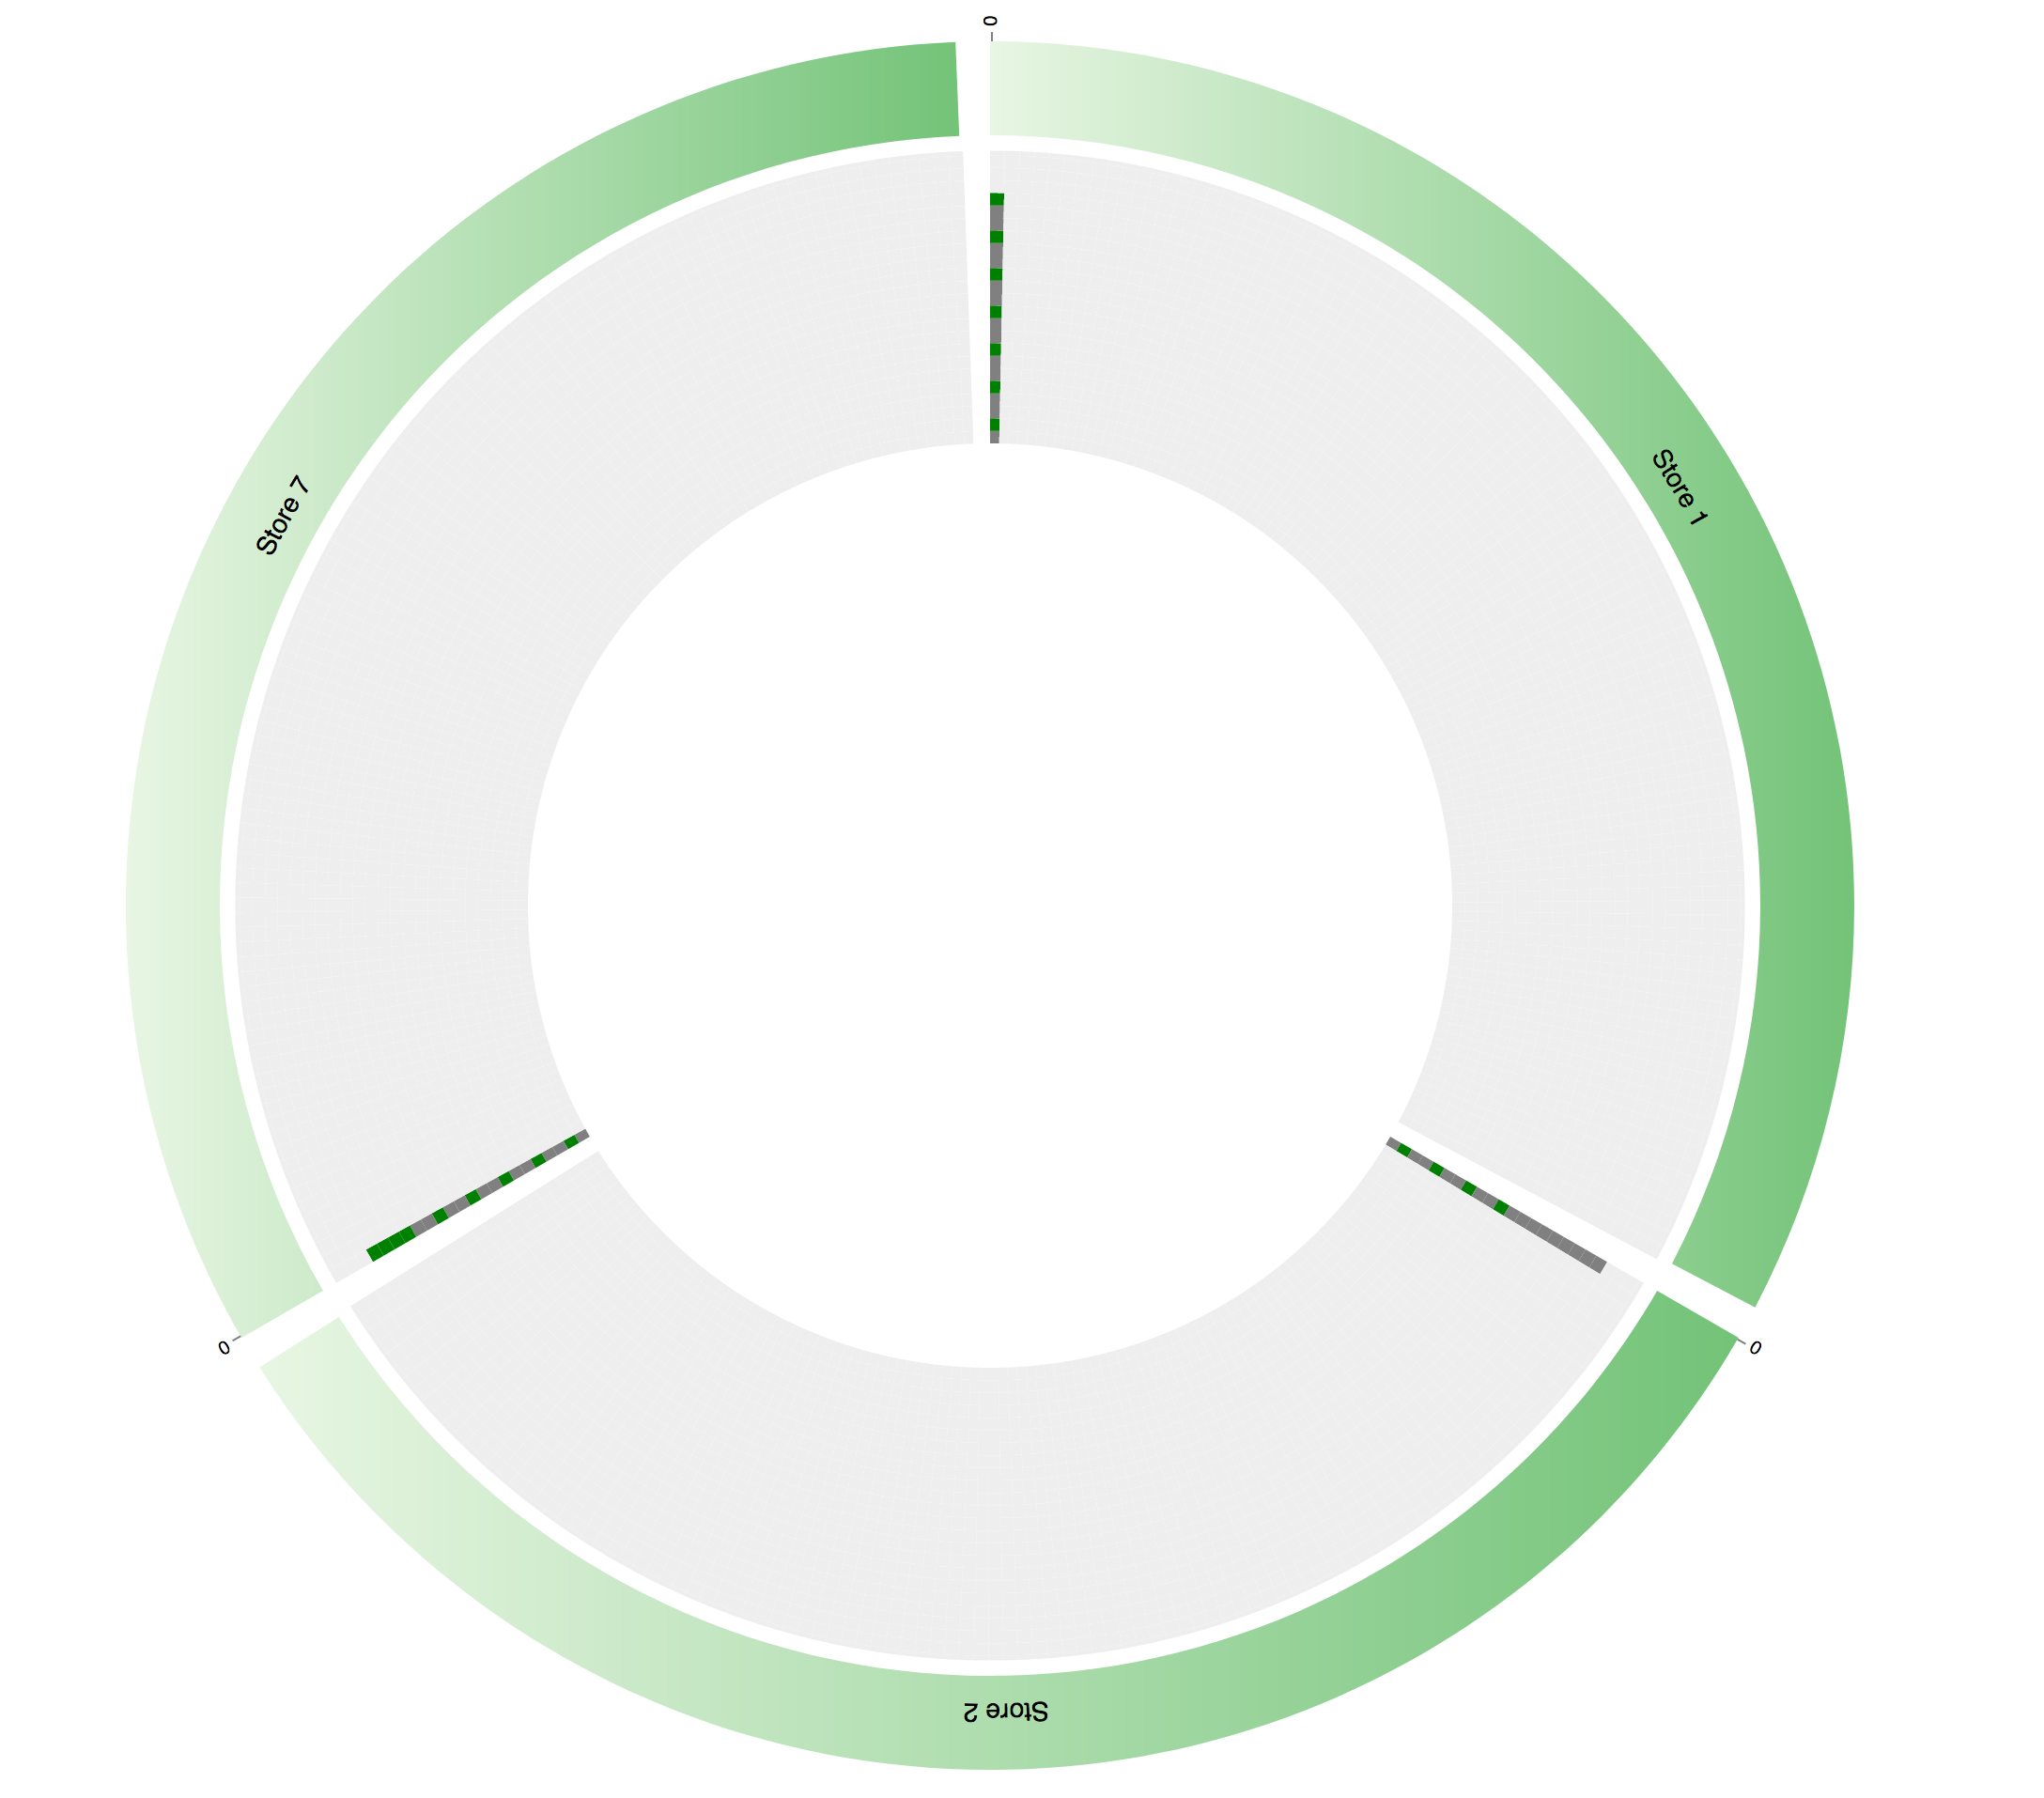
- Now go to TiDB-vision at http://localhost:8010 (TiDB-vision is a cluster visualization tool to see data transfer and load-balancing inside your cluster).
- You can see a ring of 3 TiKV nodes. TiKV applies the Raft consensus protocol to provide strong consistency and high availability. Light grey blocks are empty spaces, dark grey blocks are Raft followers, and dark green blocks are Raft leaders. If you see flashing green bands, that represent communications between TiKV nodes.
- It looks something like this:
Test TiDB compatibility with MySQL
As we mentioned, TiDB is MySQL compatible. You can use TiDB as MySQL secondaries with instant horizontal scalability. That’s how many innovative tech companies, like Mobike, use TiDB.
To test out this MySQL compatibility:
- Keep the
tidb-docker-composerunning, and launch a new Terminal tab or window. - Add MySQL to the path (if you haven’t already):
export PATH=${PATH}:/usr/local/mysql/bin - Launch a MySQL client that connects to TiDB:
mysql -h 127.0.0.1 -P 4000 -u root
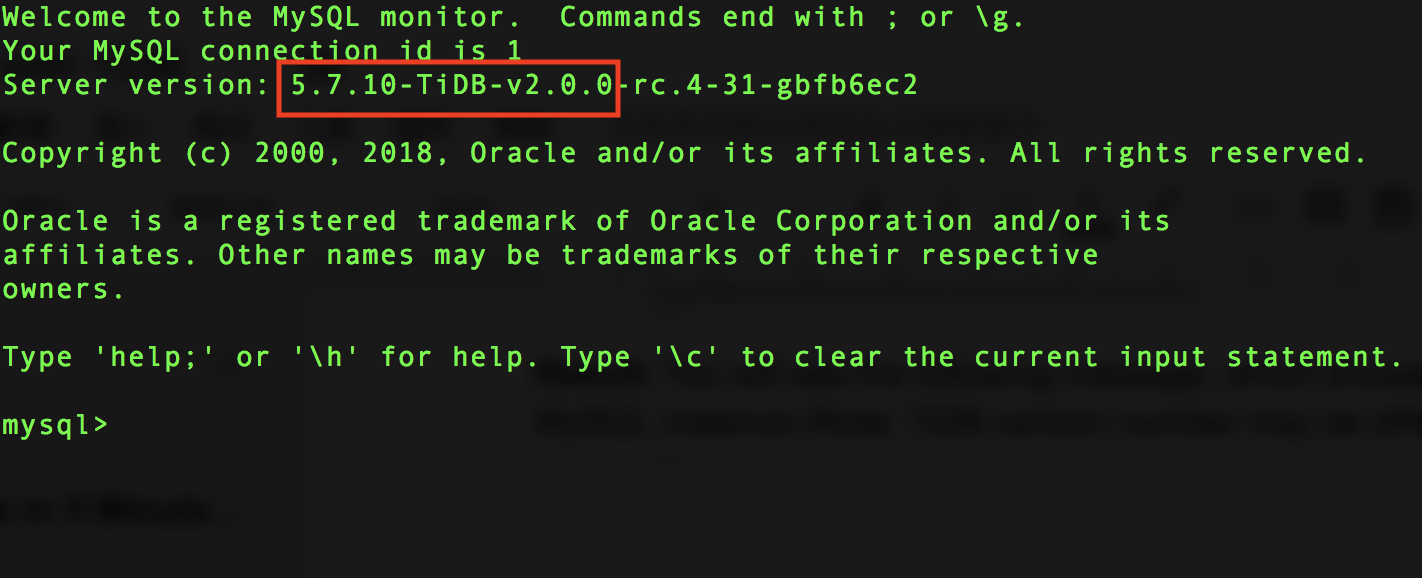
Result: You will see the following message, which shows that TiDB is indeed connected to your MySQL instance:
Note: TiDB version number may be different.
Server version: 5.7.10-TiDB-v2.0.0-rc.4-31
Let’s get some data!
Now we will grab some sample data that we can play around with.
- Open a new Terminal tab or window and download the
tispark-sample-data.tar.gzfile.wget http://download.pingcap.org/tispark-sample-data.tar.gz - Unzip the sample file:
tar zxvf tispark-sample-data.tar.gz - Inject the sample test data from sample data folder to MySQL:
cd tispark-sample-data
./sample_data.sh
This will take a few seconds.
- Go back to your MySQL client window or tab, and see what’s in there:
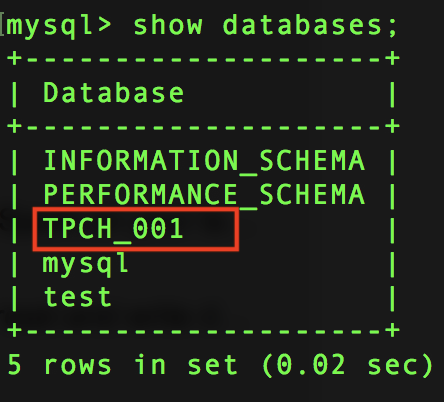
SHOW DATABASES;Result: You can see the
TPCH_001database on the list. That’s the sample data we just ported over.
Now let’s go into
TPCH_001:USE TPCH_001; SHOW TABLES;Result: You can see all the tables in
TPCH_001, likeNATION,ORDERS, etc. - Let’s see what’s in the
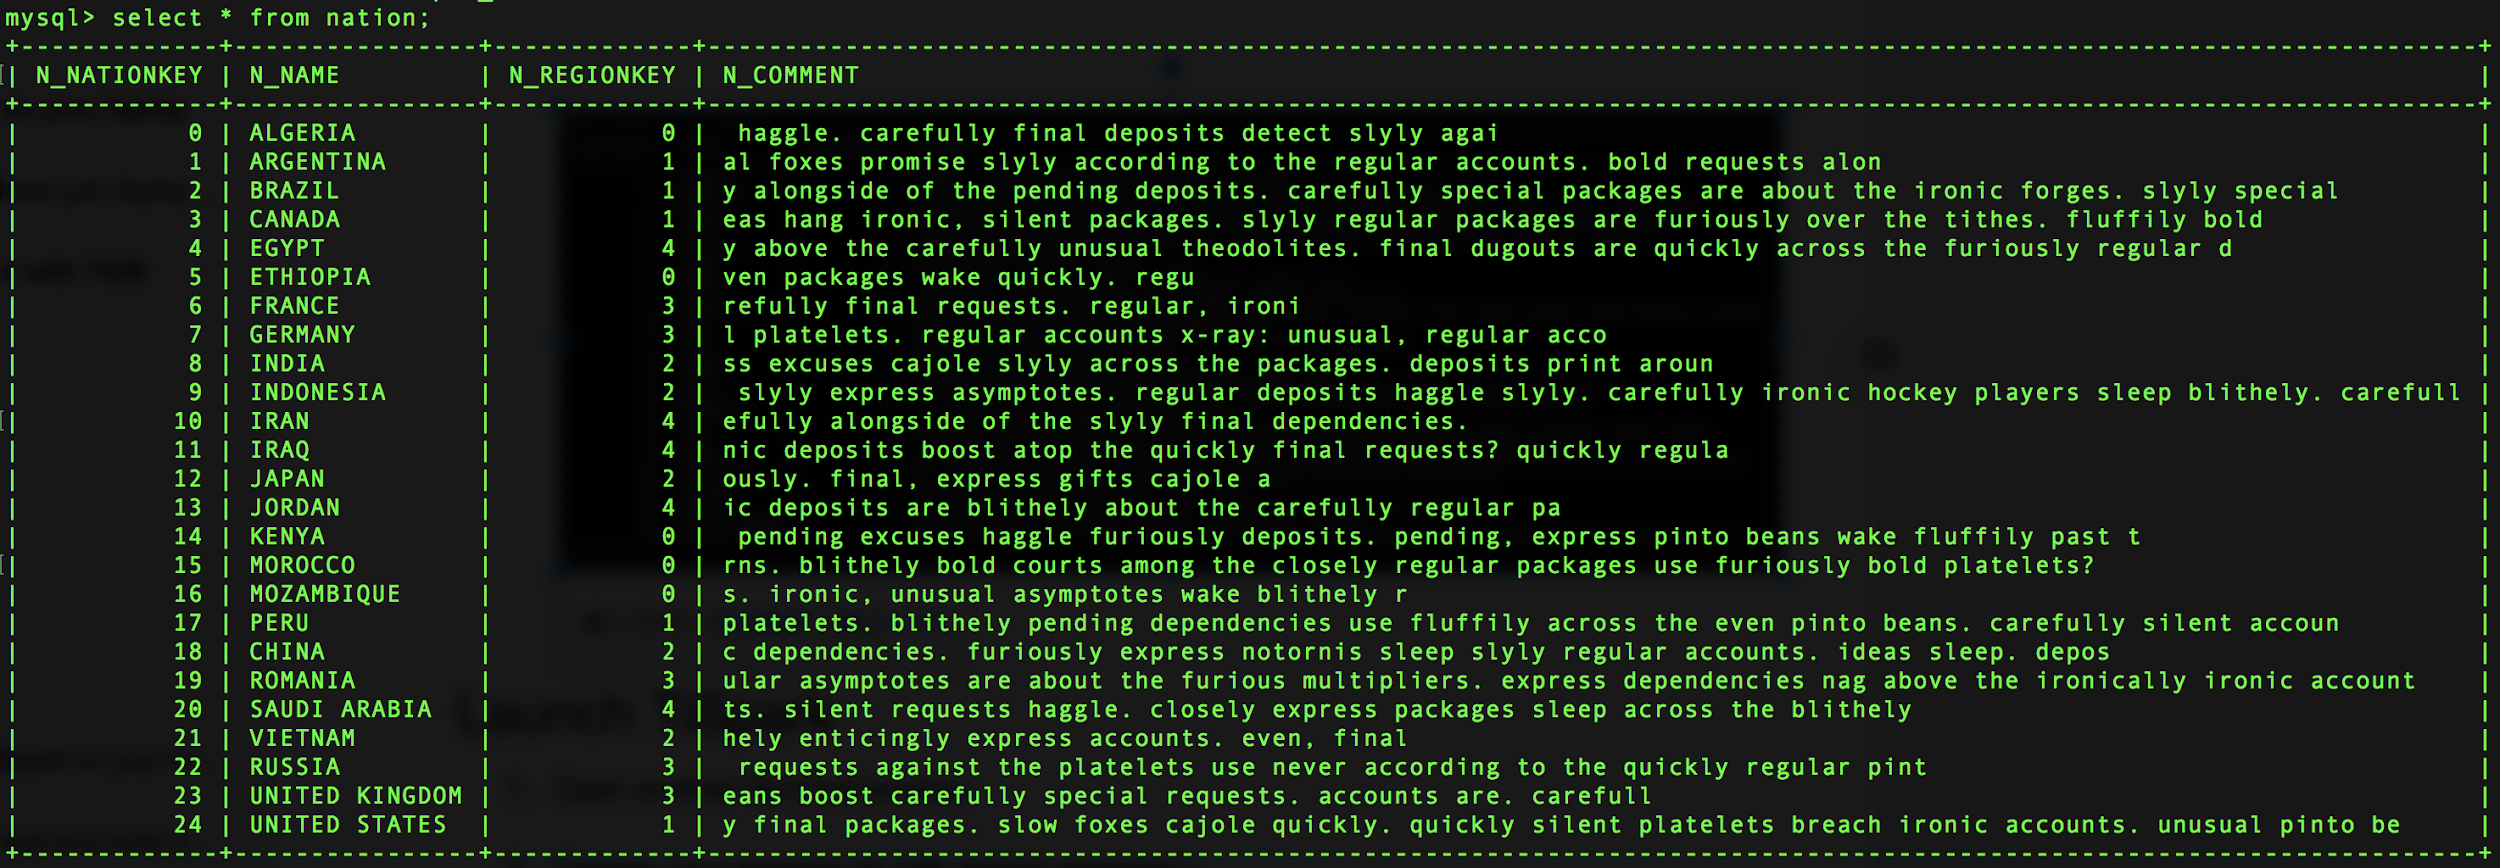
NATIONtable:SELECT * FROM NATION;
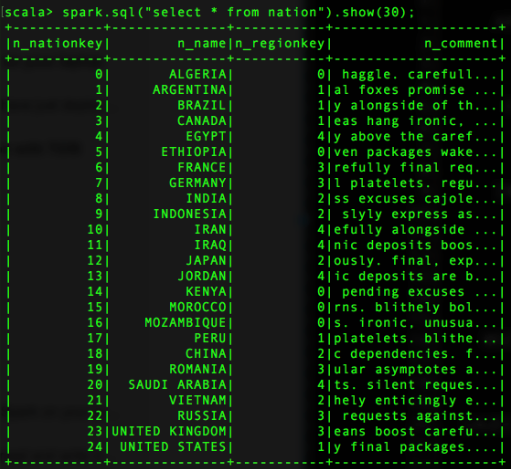
Result: You’ll see a list of countries with some keys and comments.
Launch TiSpark
Now let’s launch TiSpark, the last missing piece of our hybrid database puzzle.
- In the same window where you downloaded TiSpark sample data (or open a new tab), go back to the
tidb-docker-composedirectory. - Launch Spark within TiDB with the following command:
docker-compose exec tispark-master /opt/spark/bin/spark-shellThis will take a few minutes.
Result: Now you can Spark!

- Use the following command to set
TPCH_001as default database:spark.sql("use TPCH_001")It looks something like this:

- Now, let’s see what’s in the
NATIONtable (should be the same as what we saw on our MySQL client):spark.sql("select * from nation").show(30);Result:

Let’s get hybrid!
Now, let’s go back to the MySQL tab or window, make some changes to our tables, and see if the changes show up on the TiSpark side.
- In the MySQL client, try this
UPDATE:UPDATE NATION SET N_NATIONKEY=444 WHERE N_NAME="CANADA"; SELECT * FROM NATION; - Then see if the update worked:
SELECT * FROM NATION; - Now go to the TiSpark Terminal window, and see if you can see the same update:
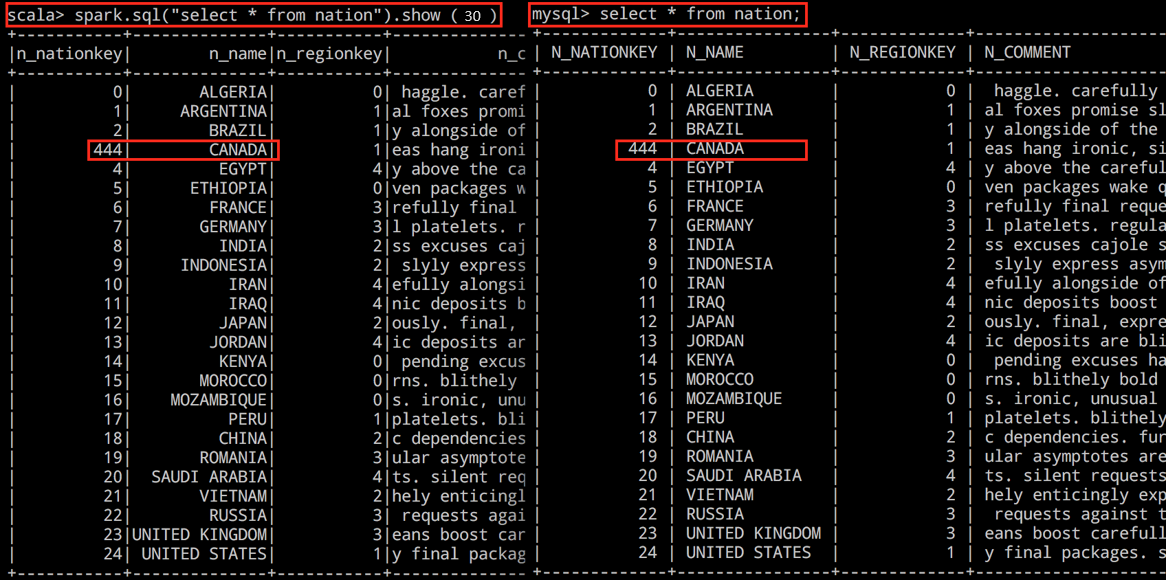
spark.sql("select * from nation").show(30);Result: The
UPDATEyou made on the MySQL side shows up immediately in TiSpark!
You can see that both the MySQL and TiSpark clients return the same results — fresh data for you to do analytics on right away. Voila!
Summary
With this simple deployment of TiDB on your local machine, you now have a functioning Hybrid Transactional and Analytical processing (HTAP) database. You can continue to make changes to the data in your MySQL client (simulating transactional workloads) and analyze the data with those changes in TiSpark (simulating real-time analytics).
Of course, launching TiDB on your local machine is purely for experimental purposes. If you are interested in trying out TiDB for your production environment, send us a note: info@pingcap.com or reach out on our website. We’d be happy to help you!
Experience modern data infrastructure firsthand.
TiDB Cloud Dedicated
A fully-managed cloud DBaaS for predictable workloads
TiDB Cloud Serverless
A fully-managed cloud DBaaS for auto-scaling workloads
