
Authors: Zhen Chen, Zhiyuan Liang (TiDB Community Engineers at PingCAP)
Editors: Fendy Feng, Tom Dewan
TiDB Cloud is a fully-managed Database-as-a-Service (DBaaS) that brings everything great about TiDB, an open source Hybrid Transactional and Analytical Processing (HTAP) database with horizontal scalability, to your cloud. Snowflake is a cloud computing-based data warehousing company that provides cloud-based data storage and analytics service.
By combining these two Software-as-a-Service (SaaS) products together, we quickly built an online e-commerce system. This system can process a large amount of data in real time. It also alleviates the scalability bottleneck of traditional MySQL solutions— especially when the amount of business data skyrockets. Besides, this system is easier to operate and maintain.
In this tutorial, we will introduce this e-commerce solution and walk you through how to configure and use it. You can also check out the following video directly.
A quick view of this solution
This system uses TiDB Cloud to process and store business data such as orders, expresses and user profile data in real time, and uses Snowflake as a data warehouse to archive cold data and provide data warehouse modeling. Due to TiDB’s powerful real-time analysis capabilities, the solution provides you a unified view to check the analytical results, and can convert the results into quick business intelligence for decision making. The interface of this solution has six sections, including the Dashboard, Customers, Items, Recommended Items, Orders, and Pipelines.
Dashboard
The Dashboard gives you a quick overview of all the analytical results returned by TiDB Cloud. For example, you can check the top sales in real time by product items and their prices, check the total amount of money earned, the total number of orders sold, and the total number of customers on a specific day or in real time.
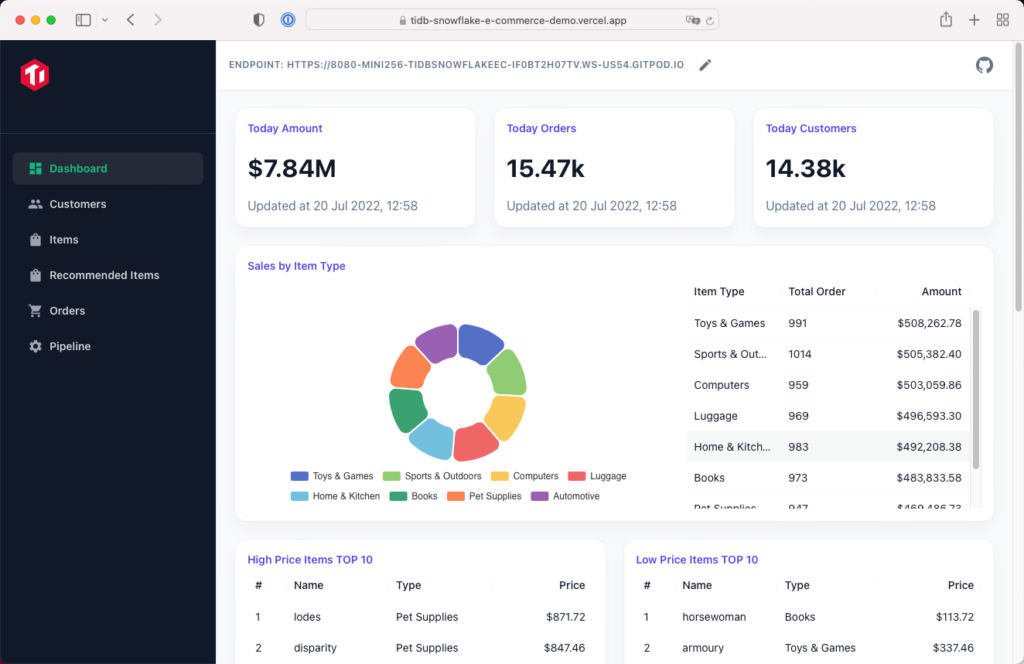
At the bottom of the Dashboard page, you also see a real-time analysis chart that filters today’s orders from the order table, calculates the sum, and writes it into the order_stats_history table every two minutes.

Customers
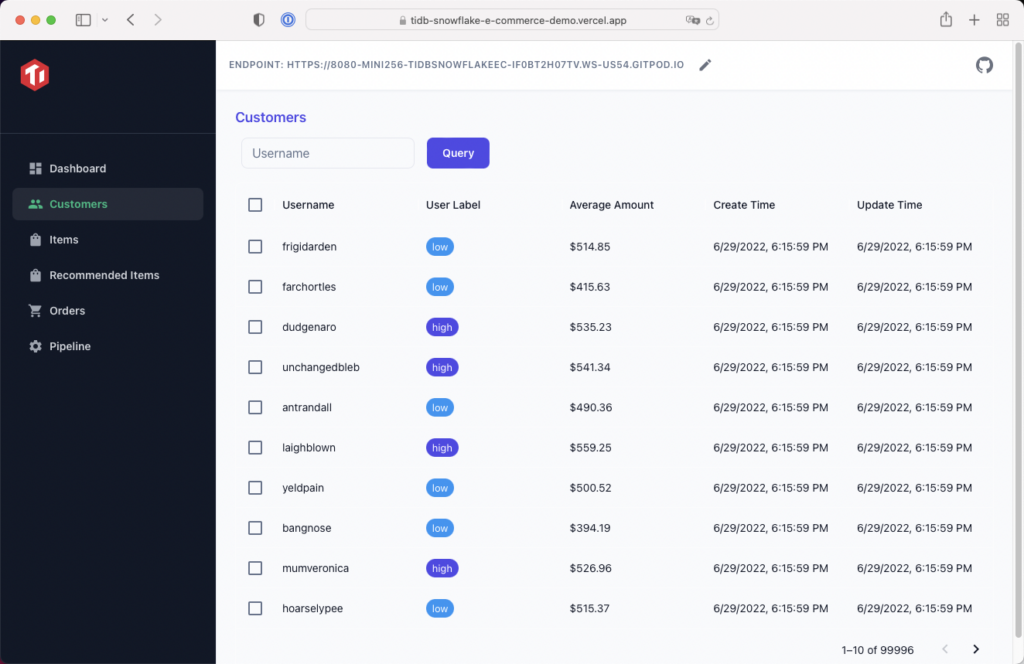
Snowflake labels each customer as a high or low net worth user according to their spending. If a customer’s spending is greater than the average spending of all customers, they are labeled as a high-net-worth user, otherwise they are labeled as a low-net-worth user. On the Customer page, you can easily check any customer’s user label and their average spending by entering their usernames.
Items
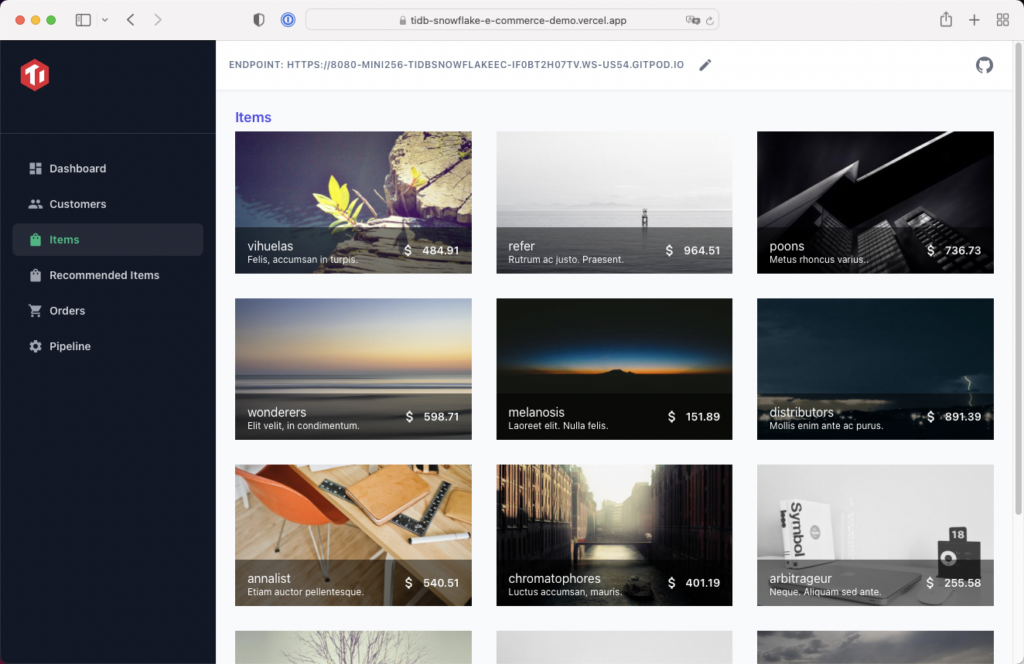
The Items page displays all the products with their prices.
Recommended Items
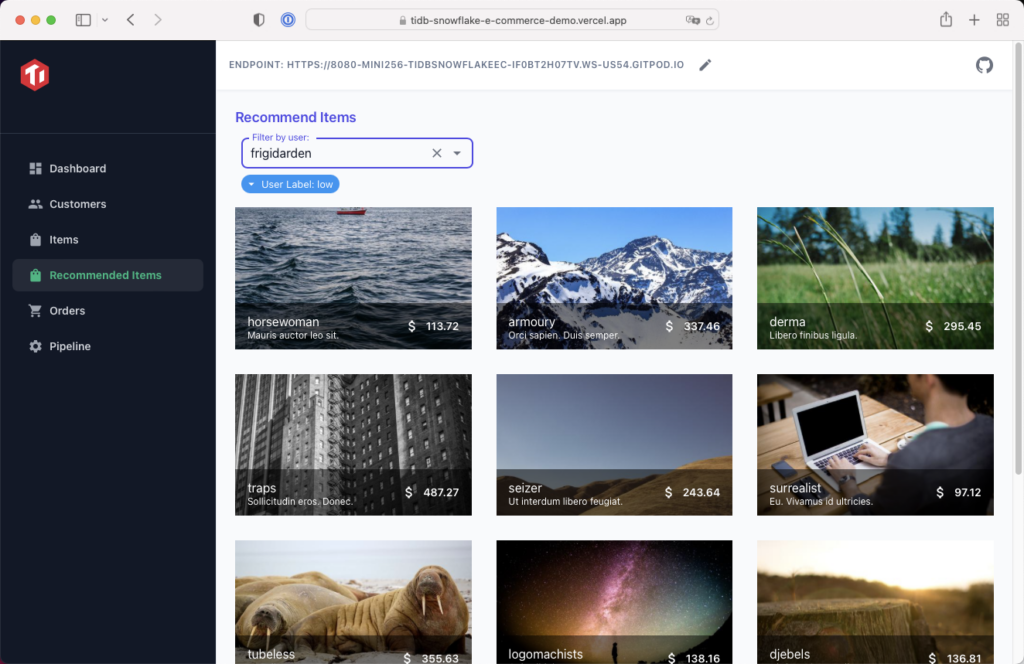
If you enter the username of any customer on the Recommended Items page, you can get a list of recommended products for this customer according to their purchasing preferences.
Orders
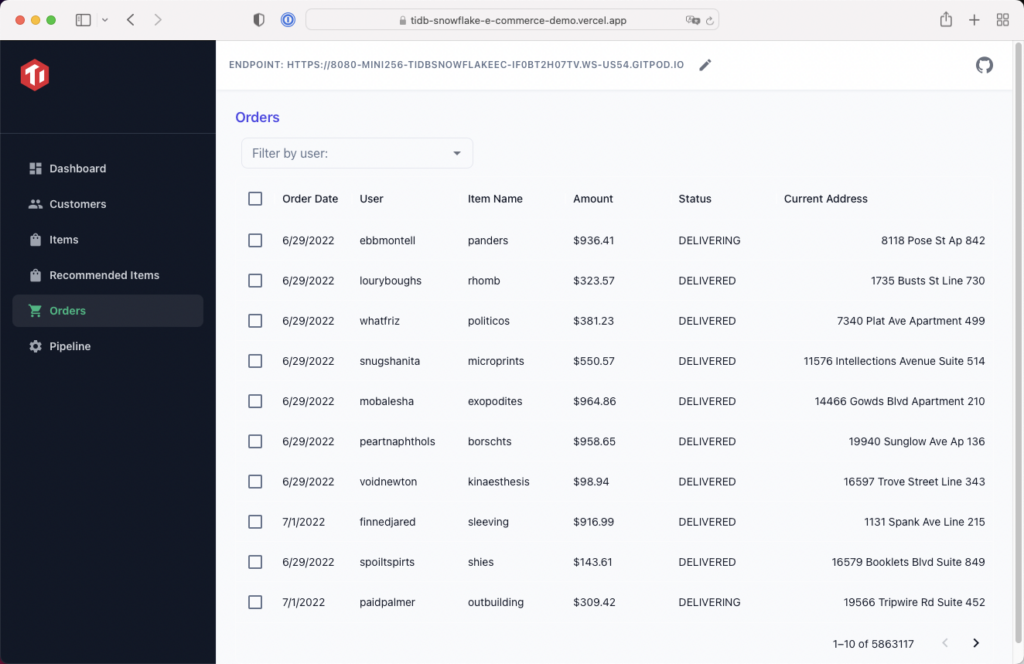
On the Orders page, you can check all the orders in real time, and by entering the username of any customers, you can also check all their orders in real time.
Pipeline
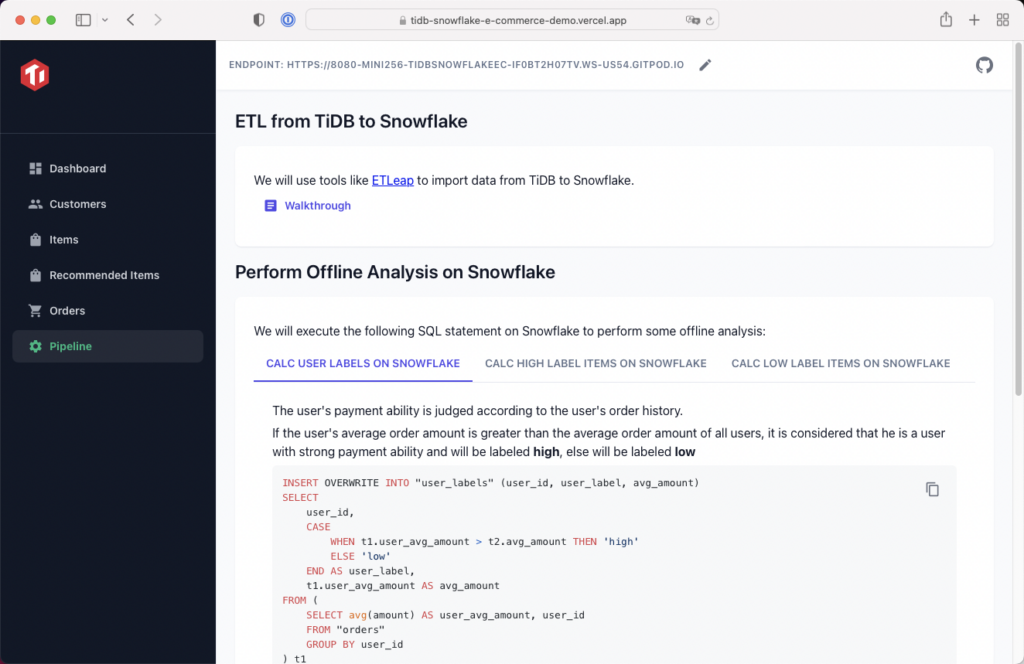
The Pipeline page guides you to build the pipeline between TiDB Cloud and Snowflake. We will cover this in detail later.
System architecture
The diagram below shows the architecture of our e-commerce system. It includes three layers: the business layer (frontend application), the data center layer (TiDB Cloud), and the data warehouse layer (Snowflake).

The demo architecture
Business layer
The business layer is where frontend applications generate a large amount of business data such as orders and shipping information.
Data center layer
In the data center layer, TiDB Cloud collects and stores the business data migrated from the business layer. It provides data services, such as recommending hot-selling products with high or low unit prices, filtering high- or low-net-worth customers, and generating weekly sales reports. TiDB Cloud also provides a unified view where users can query their orders and shipping information in real time, and business staff can monitor daily product sales, analyze user consumption, and label users according to their purchasing behaviors in real time.
Data warehouse layer
In this layer, Snowflake serves as a data warehouse to archive cold data such as historical orders and express information from TiDB Cloud. Snowflake also offers a complete data warehouse modeling; for example, it can calculate the monthly bill of each user.
Before you try this solution
This solution needs a custom backend to perform all data operations. So, if you’d like to try this by yourself, review the following configuration guide to learn how to configure and use it.
Step-by-step configuration guide
Run the demo backend
- Open the GitHub repository of our application and click Open in Gitpod.
- Authorize Gitpod to access your GitHub account. Click Continue with GitHub and sign in to your GiHub account.
- After you finish the authorization, a new workspace runs automatically. We have defined the scripts in
gitpod.yml. - On the Simple Browser tab, under the Endpoint field, click Check. When port
8080is ready, the Gitpod workspace will open a preview tab of the live demo.
If the workspace runs successfully, the backend server will serve port 8080. However, in the Gitpod workspace, the port needs to be forwarded. You can find the public port 8080 URL in the Endpoint field on the Simple Browser tab as shown in the screenshot below.
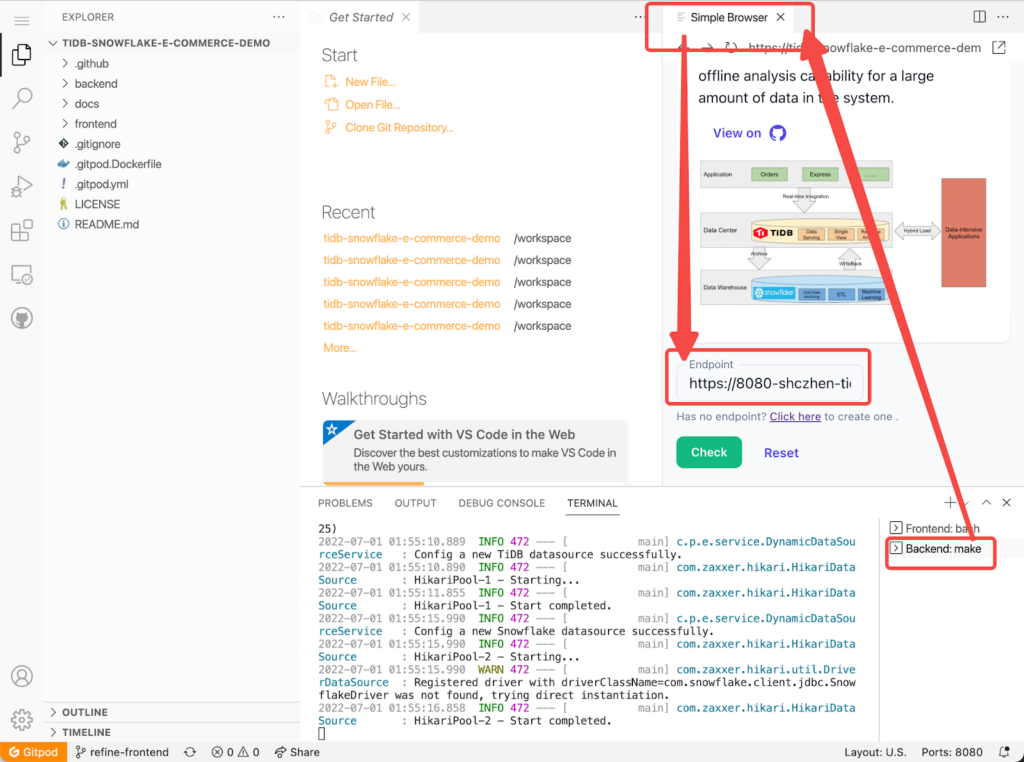
Warning: The Gitpod preview tab has limitations and may cause your operations to fail. To avoid this, we recommend you copy the Endpoint URL and paste to a new browser tab.
Configure the demo
- Visit this demo and paste the endpoint URL you copied earlier to the Endpoint field. Then, click Check. Now, port
8080is successfully connected. - Click Walkthrough and follow the guide to sign in and configure your TiDB Cloud. If you do not have a TiDB Cloud account, click here to sign up for one first.

Configure the TiDB Cloud connection
- Create a Developer Tier cluster, which lets you try TiDB Cloud for free for one year. On the Create a Cluster (Dev Tier) page, set up your cluster name, password, cloud provider (only AWS is available for the Dev Tier), and region (a nearby region is recommended). Then click Create to create your cluster.
Note: It takes about 5 to 15 minutes to create your TiDB Cloud cluster. You can check the creation status on the Active Clusters page. - After you create a cluster, you are directed to the Active Clusters page. On the right side of this page, click Connect.
- On the pop-up window, click Add Your Current IP Address to fill in your current IP address. Then, click Create Filter to create a traffic filter.
- Copy the MySQL string. You’ll use it later to connect with a SQL client.

Note: For the usage of Gitpod Workspace, you can set an Allow All traffic filter here by entering an IP address of0.0.0.0/0.
- Return to the demo page and configure the TiDB Cloud Host Address and password. In this demo, we create a database
ECOMMERCE.
- Connect to TiDB Cloud. Check your input fields and make sure each field is correct. Click Continue.
- After you successfully connect TiDB Cloud, click Create to create a schema.
- Import the initial data. Click Import.
Configure the Snowflake connection
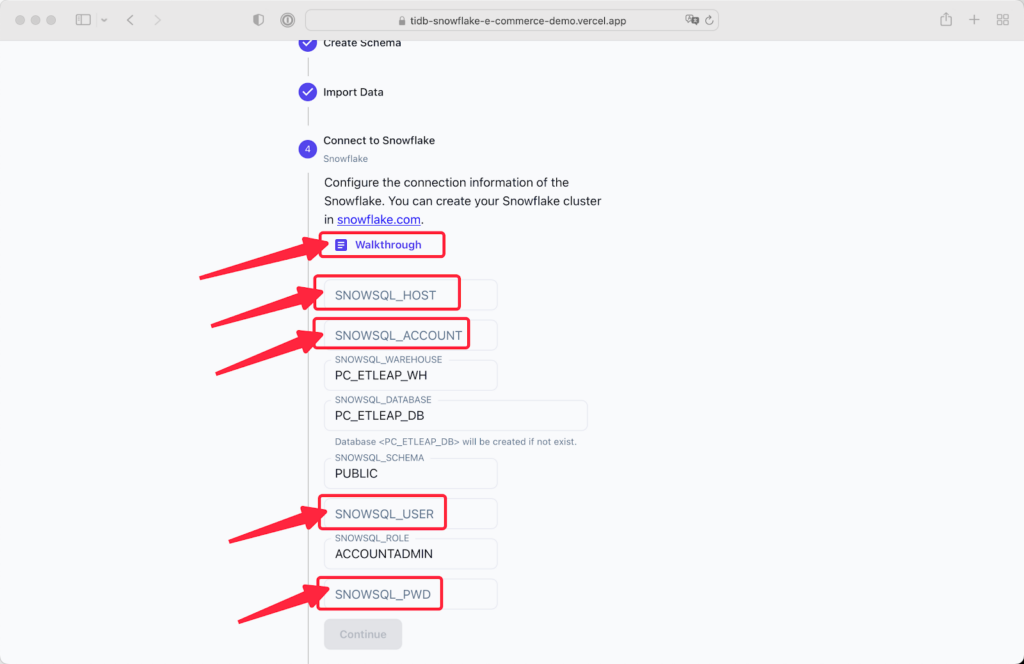
To get guidance on how to create your Snowflake cluster, click Walkthrough.
Create the Snowflake Cluster
- Click here to register a Snowflake account and choose your preferred cluster version, cloud provider, and region.
- After you register a Snowflake account, you will receive an email containing registration details such as your username and password. To activate your account, click the Snowflake link in the email.
- After your account is activated, you get your account URL for login.

- Log in to your account.
- On the Snowflake manage page, in the left navigation panel, select Admin > Partner Connect. In the Data Integration area, select ETleap.
Note:
(1) This step is for a further data pipeline from TiDB to Snowflake.
(2) The Snowflake trial account and the ETleap account expire after 30 days and 15 days respectively. - On the Connect to Etleap pop-up, click Connect.
- Activate your ETleap account. On the confirmation pop-up, click Activate. On the ETleap page, click Create Account to finish the activation process.
- After your account is set up, you can get information as shown below. You will use this data in subsequent steps.
SNOWSQL_HOST=GQ01328.ap-northeast-1.aws.snowflakecomputing.com SNOWSQL_ACCOUNT=GQ01328
SNOWSQL_WAREHOUSE=PC_ETLEAP_WH
SNOWSQL_DATABASE=PC_ETLEAP_DB
SNOWSQL_SCHEMA=PUBLIC
SNOWSQL_USER=<admin username>SNOWSQL_ROLE=ACCOUNTADMIN SNOWSQL_PWD=<admin password>
Connect to Snowflake
- Return to the demo page. Under Connect to Snowflake, complete the fields with the information you just saved and click Continue. The backend checks the connection.

- After Snowflake is connected, click Create to create a Snowflake Schema.
- After you create the schema, click Continue. This displays the demo console page.

Create a pipeline between TiDB Cloud and Snowflake
After you finish the steps above, you are directed to the console page. On this page, you can perform offline analytics on Snowflake and create a pipeline between TiDB and Snowflake. Then, the Snowflake analytical data can be written back to TiDB.
ETL data from TiDB to Snowflake
By using Extract, Transform, Load (ETL) tools such as ETleap, you can synchronize data from TiDB to Snowflake. For step-by-step synchronization guidance, click ETleap guidance.
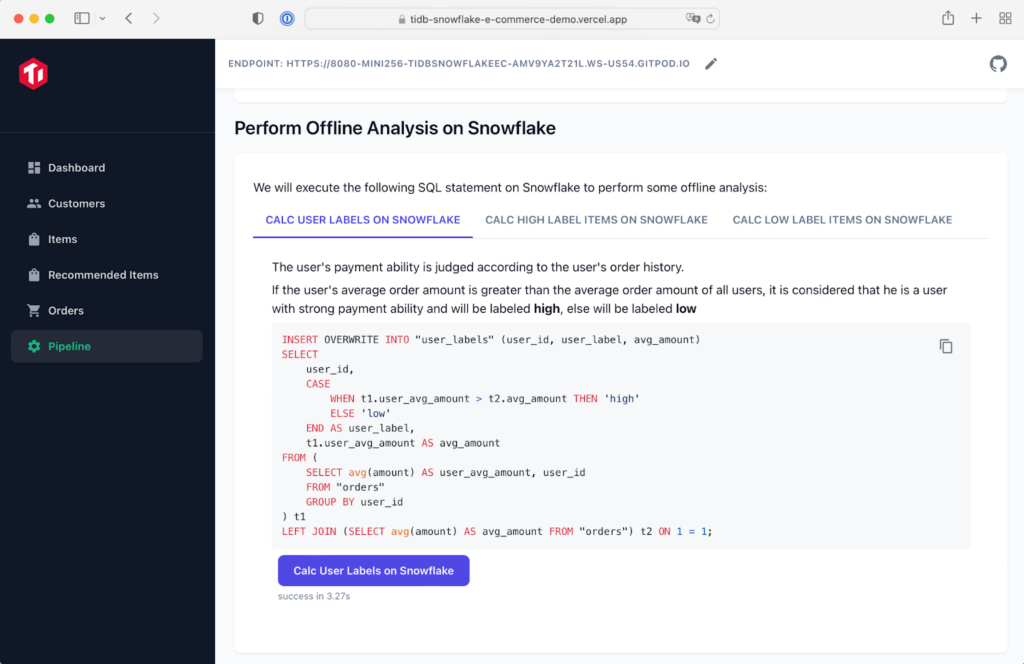
Perform offline analysis on Snowflake
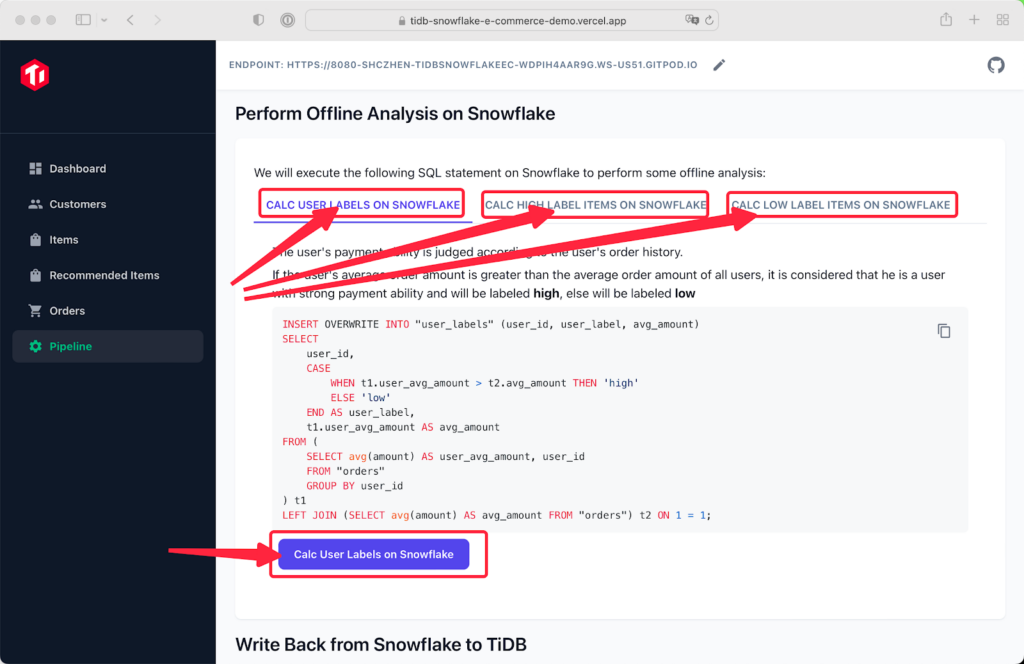
There are three different calculation jobs for analytics. Select each job and click Calc User Labels on Snowflake one by one to run the calculations.
Write back data to TiDB
To write the analytical data from Snowflake to TiDB, go to the Write Back from Snowflake to TiDB section and click Write Back.
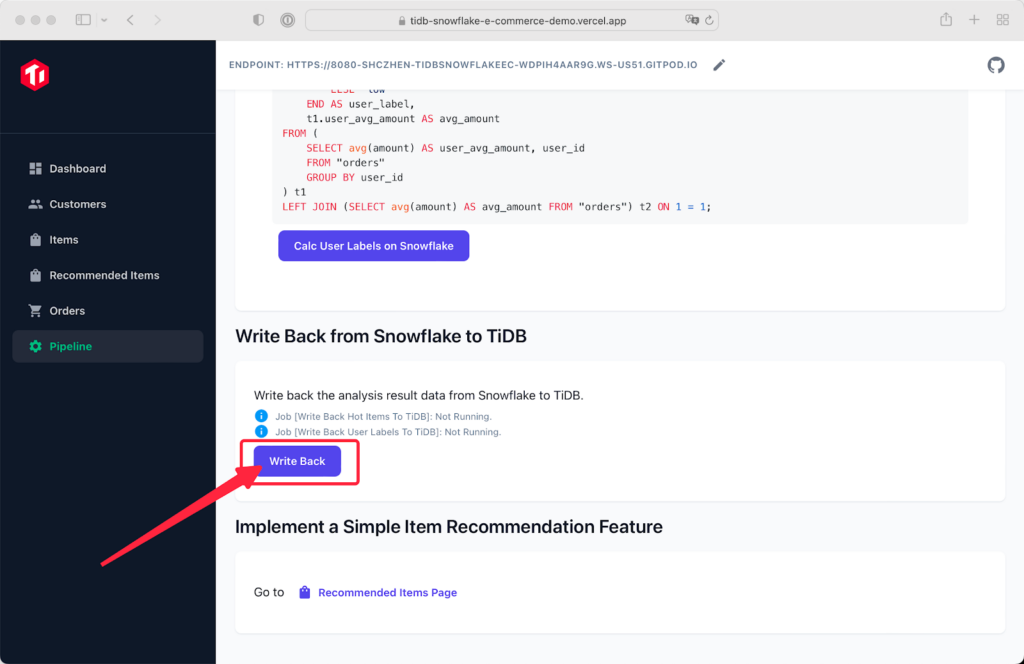
After you write the analytical data back to TiDB, you have finished configuring the system.
Validate the results
After you finish configuring this demo, you can validate the results to see if you have successfully configured this demo by clicking the buttons on the left panel. For example, click Dashboard to show a clear view of top sales by the type and price of items. Click Customers to check each customer’s user label and their average spending, and click Recommended Items to check the recommended product list of a specified customer. Click Orders to check all the orders made by each customer.


Now, you can work with this solution immediately. If you are interested in how we built our solution, you can find the source code on GitHub. You can also try TiDB Cloud in just a few minutes.
Keep reading:
Using Retool and TiDB Cloud to Build a Real-Time Kanban in 30 Minutes
Speeding up a SaaS Platform by 5x in a Day without Changing the Code
Analytics on TiDB Cloud with Databricks
Want to explore TiDB without installing any software? Go to TiDB Playground
Spin up a Serverless database with 25GiB free resources.
TiDB Cloud Dedicated
A fully-managed cloud DBaaS for predictable workloads
TiDB Cloud Serverless
A fully-managed cloud DBaaS for auto-scaling workloads


